Whatever the reason to send a thank you note, appreciation, or even a little love letter, it’s a nice gesture in our email – text worshiping world to actually make your own envelope and card and send it snail mail or even better, hand deliver!
DIY/Make Your Own Envelopes are a great way to send your peeps a gracias to let them know how grateful you are.
So, just in case you still need to thank Aunt Marcia for the wool socks from last Xmas, go the extra step and get crafty.
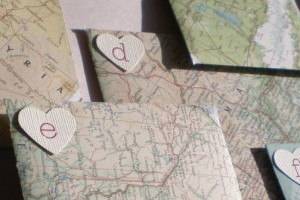
We just had a family celebration where many of the “Aunties” baked delicious desserts so I thought it’d be fun to make a batch of homemade envelopes to carry my words of gratitude. This project is so quick to do and is time well spent. Home made things just feel a bit cozier to receive than store bought because you can feel the energy of the person who made it, which is ever so appreciated by most folks. The best materials to use are interesting pages ripped out of magazines or sheets from last year’s calendars.

Below are the instructions on how to make DIY Envelopes…
Supplies:
Paper– old magazines, maps, wrapping paper, old calendars, old book jackets, paper shopping bags, or any kind of paper that meets your fancy
Scissors
Glue stick
Template of envelope– experiment with different sizes and shapes
Pencil, pen or markers- to trace envelope outline
Straight edge or ruler
To Make Personalized Envelopes
- Carefully open up an envelope and trace the outline with pen or pencil onto cardstock to use as a template or trace straight onto the paper you will be working with.
- Make sure to put the side of the paper you want to show on the outside of the envelope face down on your work surface.
- Score and fold over flaps A, B, and C.
- Glue on top side of flaps A and B.
- Fold flap C up and glue onto flaps A and B, pressing to seal side flaps.
- Score and fold down flap D.
- Place your thanks, message or any treasure in envelope and secure with a little glue, tape, or a sticker.
- Place a white label on the front of envelope if you need a clear space to address.
- Stamp your envelope if you need to.
- Finally SWAK-Seal With A Kiss.
For a great selection of envelope and box templates, check out Mirkwood Designs.